
7 min read
Disclosure: As an Amazon Associate and eBay Partner Network publisher, we earn from qualifying purchases. This doesn’t affect what we recommend or how we describe it.
Cabin owners, RV travelers, and van lifers all face one stubborn reality: fixed, flat-mounted solar panels rarely deliver their rated output except for a few hours around noon. If you want more usable power—especially in winter, cloudy weather, or when parked in shady spots—learning how to tilt your solar panels for maximum sunlight can make the difference between running everything you need and rationing power. Here’s how to dial in your setup for real-world gains, without wasting money on complicated gear you don’t need.
Spot the difference between fixed, manual, and adjustable tilt setups
| Configuration | Tilt Adjustment Range | Ease of Use | Durability | Best For |
|---|---|---|---|---|
| Flat Fixed Mount | 0° (no tilt) | Install and forget | High (no moving parts) | Minimal fuss, roof-wiring |
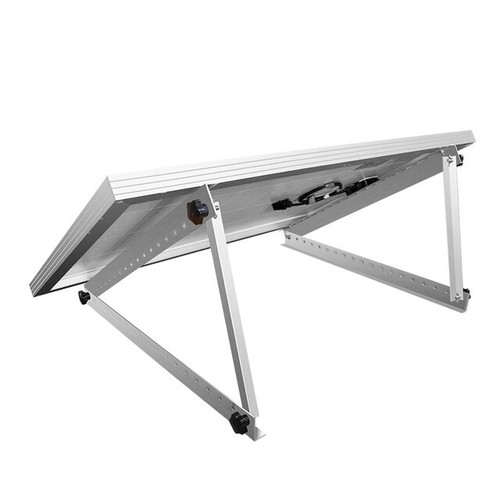
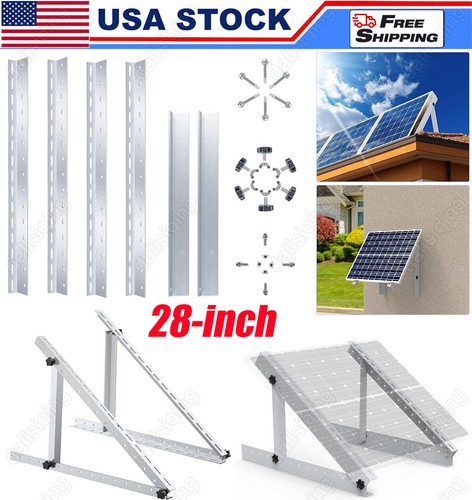
| Manual Adjustable Rack | 0–60° (by hand) | Moderate (seasonal adjustment) | Medium (hinges/bolts may loosen) | Cabins, stationary RVs |
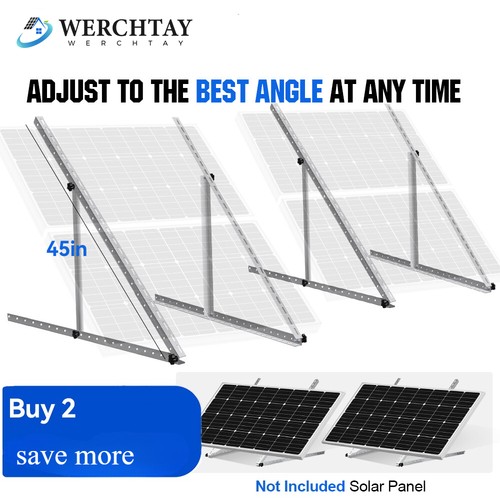
| Quick-Release Portable Stand | 0–45° (tool-free) | Easy (move & tilt anytime) | Medium (frequent handling) | Van/RV, portable use |
| Motorized Solar Tracker | 0–90° (auto-adjusts) | Effortless (auto-optimizes) | Low (electronics, motors) | High-budget, max-output setups |
Choose the right tilt angle for your location and season
Panel tilt matters most when you need every watt—during short winter days, in off-grid cabins, or when your battery bank is undersized for a run of cloudy weather. The “right” tilt angle depends on your latitude and the time of year:
- Year-round compromise: For most U.S. locations, a fixed tilt equal to your latitude gives good average performance. For example, at 40° latitude, set your panels at a 40° angle from horizontal.
- Winter boost: Add 10–15° to your latitude for winter-only setups. This steeper angle captures the low sun and sheds snow.
- Summer boost: Subtract 10–15° from your latitude for summer-only use. Flatter panels catch more midday sun.
Online calculators like SolarReviews offer easy angle recommendations by zip code. For portable or adjustable setups, changing tilt 2–4 times per year is usually enough—no need to fuss every week.
Compare optionsStep-by-step: How to tilt solar panels for maximum sunlight
- Measure your latitude. Look up your site’s latitude using a phone, GPS, or online map—this number (in degrees) is your baseline tilt angle.
- Decide on seasonal adjustment. Choose if you want to adjust tilt just once for all-year, or change it 2–4 times (spring, summer, fall, winter) to optimize output.
- Set up your tilt mount or stand. Install a rack, hinge, or portable frame that allows you to set and lock the panel angle. For fixed roof mounts, set the tilt during installation. For portable stands, use an angle finder or protractor to set the correct angle.
- Orient panels due south (northern hemisphere). Use a compass or GPS to face your panels as close to true south as possible. Small deviations (±10°) have minimal effect, but bigger errors can cut output by 10% or more.
- Lock tilt securely. Tighten bolts, adjust stands, or engage locking pins so wind or vibrations can’t move the panels. Double-check after storms or high winds.
- Monitor output and adjust if needed. Check your charge controller or battery monitor to see if output improves after adjusting tilt. If you’re still short on power, try fine-tuning the angle or clearing obstructions.
Weigh the pros and cons: Fixed vs. adjustable vs. portable tilting
Flat, roof-mounted panels are simple and reliable, but in most climates, you’ll get 15–40% less annual energy than from a properly tilted array. Adjustable racks give you flexibility, but require seasonal effort and can loosen over time. Portable stands let you move panels into the sun and adjust tilt anytime, but need daily setup and are prone to theft or damage if left unattended. Motorized trackers maximize output but rarely pay off for small off-grid systems—maintenance and failure risk are real concerns.
For most off-grid cabins and full-time RVers, a manual adjustable rack hits the sweet spot: 0–60° tilt range, no electronics to fail, and you can set-and-forget for months at a time. For weekend van trips or occasional tailgating, a portable stand with quick-release legs (weighing under 10 lbs for a 100W panel) is easier to stash and adjust.
See today’s dealsRelated Guides
- Our guide to Portable Solar Panels for Camping, Reviewed
- How to Choose the Right Solar Panel Tilt Mount for Your RV
- Our guide to How to Install Solar Panels on a Curved Roof: A Practical Guide
- How to Optimize Your Solar Panel Angle for Maximum Power Output
- Our guide to How to Wire Multiple Solar Panels: A Step-by-Step Guide
- Our guide to 12V Solar Charge Controller Circuit Diagram Explained
Total cost of ownership
Tilting your panels isn’t just about the rack price. Factor in these ongoing or hidden costs before you buy:
- Replacement hardware: Hinges, bolts, and locking pins wear out with frequent adjustment. Budget $10–$30 per year for replacements on a 4-panel rack.
- Panel cleaning and maintenance: Tilted panels shed debris better, but hinges and stands need annual lubrication or tightening. Set aside 1–2 hours per year, or pay $50–$100 for a maintenance visit if you’re not DIY-inclined.
- Wind and storm damage: Panels left tilted in high winds are more vulnerable. Insurance deductibles or out-of-pocket repairs can run $200–$500 per incident if not properly locked down.
- Portable stand losses: Portable panels are at higher risk of theft or accidental damage. Consider a $30–$60 lock kit or budget for a replacement every few years.
- Extra wiring or connectors: Adjustable and portable setups need longer cables and weather-resistant connectors. Expect to spend $15–$40 per panel beyond a fixed mount.
FAQs about tilting solar panels for best results
How much extra power can I get by tilting my panels?
Tilting your panels to the optimal angle can boost daily output by 20–40% in winter and 10–20% in summer, compared to flat mounting. The exact gain depends on your latitude and site shading. For example, a 400W array in Minnesota tilted for winter can produce 3–4 extra amp-hours per panel per day versus flat mounting.
Should I choose a fixed tilt or adjustable rack for a cabin setup?
Adjustable racks offer the best year-round performance if you’re willing to adjust tilt 2–4 times per year. For cabins that aren’t visited often, a fixed tilt set to your latitude plus 10–15° (for winter) is a good compromise—less output in summer, but you’ll avoid the hassle of seasonal changes.
Manual tilt vs. motorized tracker—what’s better for off-grid reliability?
Manual tilt mounts are much more reliable for off-grid use, especially in remote areas. Motorized trackers can increase output by another 10–20%, but they add complexity and are prone to mechanical or electronic failure, which can leave you with zero output if they break.
How often do I need to adjust panel tilt for maximum sunlight?
For most off-grid users, adjusting tilt 2–4 times a year (spring, summer, fall, winter) captures nearly all the potential gain. Daily or weekly adjustment gives only marginal extra output and isn’t worth the effort unless you’re chasing every last watt.
What’s the risk if I leave panels tilted during storms?
Panels tilted at a steep angle catch more wind and are at higher risk of damage during storms. Always lock down tilt mounts securely and, for portable panels, lay them flat or store them inside when high winds are forecast.
Are portable, tiltable panels compatible with all charge controllers?
Most portable panels with MC4 or Anderson connectors work with standard PWM or MPPT charge controllers, as long as the voltage and current ratings match. Always check that the open-circuit voltage (Voc) of your panel is within your charge controller’s input range before plugging in.
How long does it take to set up or adjust a manual tilt rack?
For a typical 2–4 panel manual tilt rack, adjusting tilt takes 10–20 minutes with basic hand tools. Portable stands can be adjusted in under 2 minutes per panel, especially if they have tool-free quick-release legs.
Can tilting panels solve your off-grid power shortfall?
Sometimes, tilting your panels is the quickest way to boost off-grid solar output without buying more panels or batteries. But it only pays off if you’re willing to set the right angle, lock everything down for wind, and keep up with occasional maintenance. For those who need power through winter, have limited roof space, or want to keep battery charging healthy, a well-tilted array is worth the investment. For occasional users or those in sunny climates year-round, flat mounting may be simpler and more cost-effective.
For more on solar performance and system sizing, see resources from the U.S. Department of Energy.

Last updated: July 2026 · How we cover this topic