8 min read
Trying to wire a 12V solar setup without a proper charge controller is a recipe for frustration and dead batteries. Whether you’re powering lights in a remote cabin, keeping your RV fridge cold, or running a vanlife adventure, understanding the best circuit options for a 12V solar charge controller is the difference between reliable power and expensive mistakes. This guide breaks down the real-world choices, shows how various controller types are wired, and helps you pick (or build) the right controller for your system—without getting lost in technical jargon or risking your off-grid investment.
Comparison Table: 12V Solar Charge Controller Circuit Approaches
| Approach | Max Panel Input | Controller Type | Key Feature | Practical Drawback |
|---|---|---|---|---|
| Basic PWM Module | 120W @ 12V | PWM | Simple 3-stage charging | Low efficiency with higher voltage panels |
| DIY MOSFET Circuit | 80W @ 12V | PWM (Discrete) | Fully homebuilt, repairable | No protections, needs tuning |
| Mid-range MPPT Controller | 260W @ 12V | MPPT | Automatic voltage tracking, 98% efficiency | Bulkier, needs cooling |
| All-in-One Smart Controller | 400W @ 12V | MPPT + Bluetooth | Remote monitoring, programmable | Complex setup, higher cost |
What Makes a 12V Solar Charge Controller Circuit Diagram “Best” for Off-Grid Use?
For most off-grid users, the “best” circuit diagram isn’t just about efficiency; it’s about matching your solar panel wattage, battery chemistry, and expected loads to a controller that won’t let you down. A simple PWM (Pulse Width Modulation) controller is often enough for small systems—think 100W panel and a single 12V lead-acid battery. If you’re running multiple appliances or planning to expand, an MPPT (Maximum Power Point Tracking) controller circuit is worth the extra investment. Always check the controller’s rated input voltage and current; for instance, a 10A unit can safely handle up to 120W at 12V, but running more than that risks overheating and failure.
Typical 12V Charge Controller Circuit Diagrams: What’s Out There?
Most real-world 12V solar charge controller circuits fall into one of two categories:
- PWM-Based Circuits: These use a microcontroller or discrete components (like a MOSFET and comparator) to “pulse” the solar input, limiting charge as the battery fills. Simple, cheap, but limited in efficiency—especially if your panel voltage is much higher than 12V.
- MPPT-Based Circuits: These are more complex, using a microprocessor to dynamically adjust how much current is drawn from the panel. An MPPT circuit can harvest 15–30% more power in real-world conditions, especially with panels rated above 17V open-circuit.
DIYers sometimes build PWM circuits from scratch, but reliable MPPT designs require advanced electronics skills and precise components. For off-grid reliability, most users are better off with a proven, enclosed controller—unless you’re troubleshooting or learning.
Example: Simple PWM Charge Controller Circuit Diagram Explained
Here’s how a classic beginner-friendly PWM circuit works:
- Solar panel positive connects to controller input (+), negative to input (–).
- The controller uses a MOSFET (rated for at least 20A, 40V) to switch current on/off, controlled by a voltage comparator that monitors battery voltage.
- When battery voltage is below 13.8V, the MOSFET stays on, allowing full current to flow.
- As battery reaches full charge (~14.4V for lead-acid), the comparator pulses the MOSFET, reducing current and preventing overcharge.
- Some circuits add a blocking diode (Schottky, 20A, 45V) to prevent reverse current at night.
While you’ll find many schematics online, always check that component ratings match your system’s max voltage and current. Underrated parts are a common source of DIY failures.
When to Use an MPPT Charge Controller Circuit Instead
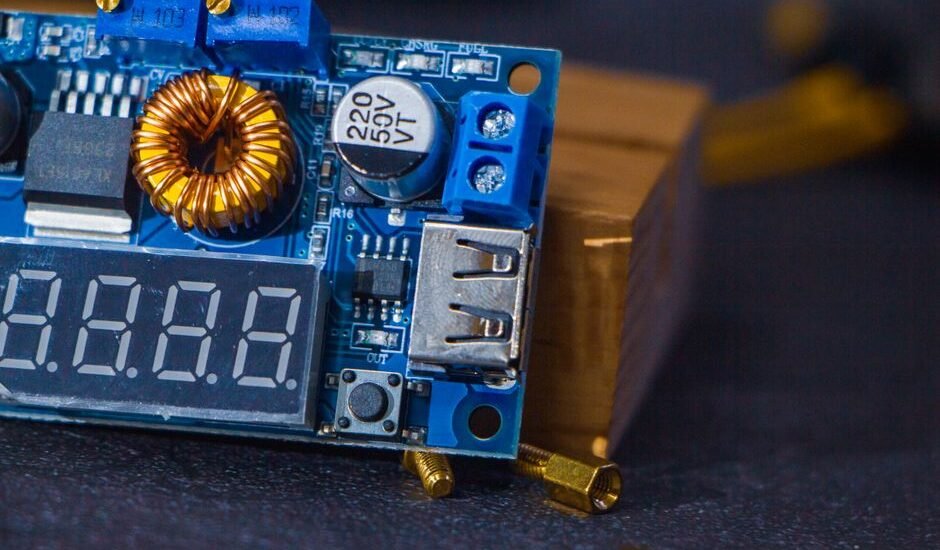
If your solar panel’s open-circuit voltage (Voc) is much higher than your battery voltage—say, a 24V or 36V panel charging a 12V battery—PWM controllers waste that extra voltage as heat. An MPPT circuit uses a DC-DC converter (often a buck or buck-boost topology) to step down the voltage efficiently and deliver more current to the battery. This is especially important for setups over 150W or if you want to future-proof your system.
MPPT circuit diagrams are more involved, typically including:
- A microcontroller (like Arduino or STM32) to run the tracking algorithm
- Power MOSFETs or IGBTs rated 30–40A, 60V+
- Inductors and capacitors sized for 15–30A continuous current
- Current and voltage sensors for real-time feedback
You’ll rarely see robust, field-tested DIY MPPT circuits due to the complexity and risk of damaging batteries. For most users, a factory-built MPPT controller is the safest option. View what’s available
Matching Your Circuit to Battery Type and Load
The circuit you choose must match your battery’s chemistry. Lead-acid batteries (AGM, flooded, gel) need 3-stage charging: bulk, absorption, float. Lithium batteries demand precise voltage cutoffs and may need temperature compensation. Always check your battery’s datasheet for recommended charge voltages—charging a 12V LiFePO4 battery above 14.6V can cause permanent damage, while undercharging lead-acid shortens its lifespan.
For loads like fridges, fans, or inverters, the controller’s load output (if present) should be sized for continuous current draw. Most budget PWM circuits can only switch 10A or less—enough for lights and USB chargers, but not for heavy appliances. For higher loads, connect your inverter or main DC bus directly to the battery with an inline fuse, not through the controller’s load terminals.
Related Guides
- How to Use a Solar Charge Controller: Step-by-Step Instructions
- How to Choose the Right Solar Charge Controller for Lithium Batteries
- Choosing the Best Solar Generator Kit for Home Backup Power
- Our guide to What Is the Ideal Tilt Angle for Solar Panels?
- Solar Generators vs Gas Generators: Which Is Better for Off-Grid Power?
- How to Tilt Solar Panels for Maximum Sunlight: A Practical Guide
- Browse all Charge Controllers →
- Our guide to 12V Refrigerators for Van Life: Our Top Picks and Advice
DIY vs Ready-Made: Which 12V Charge Controller Circuit Is Right for You?
If you have electronics experience and enjoy troubleshooting, building a PWM controller circuit can be a rewarding learning project. Use oversized MOSFETs (20A+), a proven comparator IC (like LM393), and a fused input for safety. But if you need reliability or plan to leave the system unattended, a ready-made controller is usually the smarter choice. These come with built-in protections: reverse polarity, overcurrent, temperature compensation, and often digital displays or Bluetooth monitoring.
Key Specs to Check Before Buying or Building
- Maximum Input Voltage: Should be at least 25% higher than your panel’s Voc. For a 12V panel (Voc ~22V), look for controllers rated 30V+ input.
- Charge Current: Match to your panel’s max output. A 200W panel at 12V can deliver 16.6A—choose a controller rated for at least 20A for margin.
- Temperature Range: Off-grid gear lives outdoors. Look for –20°C to 50°C minimum if you’re winter camping or homesteading.
- Protections: Overcharge, short-circuit, and reverse polarity protections are must-haves for unattended systems.
- Display/Monitoring: Basic LED indicators are fine for simple setups. For larger systems, an LCD or Bluetooth app makes troubleshooting easier.
See today’s deals
FAQs: Real-World 12V Solar Charge Controller Circuit Questions
How do I size a 12V charge controller for a 200W solar panel?
Divide the panel wattage by battery voltage (200W ÷ 12V = 16.6A). Add at least 25% margin for safety, so a 20A controller is the minimum. For future expansion, a 30A controller is a safer bet.
Can I use a PWM controller with a 24V solar panel on a 12V battery?
Technically yes, but you’ll waste substantial power as heat—PWM controllers simply chop the voltage, so only the current portion is used. To use a 24V panel efficiently with a 12V battery, an MPPT controller circuit is required.
What’s the main difference between DIY and commercial controller circuits?
DIY circuits offer learning and repairability but lack advanced protections like temperature compensation, overcurrent shutdown, and precise voltage control. Commercial controllers are safer and more reliable for unattended or high-value battery banks.
How long does a typical PWM charge controller last?
Budget PWM controllers often last 2–5 years with proper use, but failure rates rise if they’re run near or above their rated current. Quality MPPT controllers can last 5–10 years, especially if kept out of direct sun and moisture.
MPPT vs PWM: Which is better for a 300W off-grid cabin setup?
For 300W of panels, MPPT is strongly recommended. It will harvest 15–30% more usable energy—especially in cloudy or cold conditions—and lets you use higher-voltage panels that are often cheaper per watt. PWM is only suitable for small, simple systems under 120W.
What happens if I oversize my charge controller?
It’s generally safe to use a controller rated for more amps than your solar array produces. This can allow for future expansion and helps the controller run cooler. However, always match the controller’s voltage rating to your panel’s open-circuit voltage.
Are returns or replacements easy if my controller fails?
This depends on the seller and the controller’s warranty. Most mid-range and premium controllers offer 1–2 year warranties. Always check the warranty terms and return process before purchase, especially for higher-priced MPPT units.
Can I use the same controller for lithium and lead-acid batteries?
Some controllers let you select battery type via a switch or app; others are hardwired for one chemistry. Using the wrong settings can damage batteries, so always verify compatibility before connecting.
Where to Find Reliable 12V Solar Charge Controller Circuit Diagrams and More
For reference and deeper technical details, consult the National Renewable Energy Laboratory for solar standards, and check battery manufacturer datasheets for charging requirements. Open-source hardware forums can be useful for DIY circuits, but always cross-check with reputable sources before building or buying.
Choosing the right 12V solar charge controller circuit is about more than just a diagram—it’s about safety, reliability, and matching your gear to real-world needs. Whether you go DIY or ready-made, start with honest specs, proven designs, and don’t skimp on protections.before you buy, and your off-grid system will thank you for years to come.
Last updated: July 2026 · About our research